
Chamomile Panna Cotta Tart
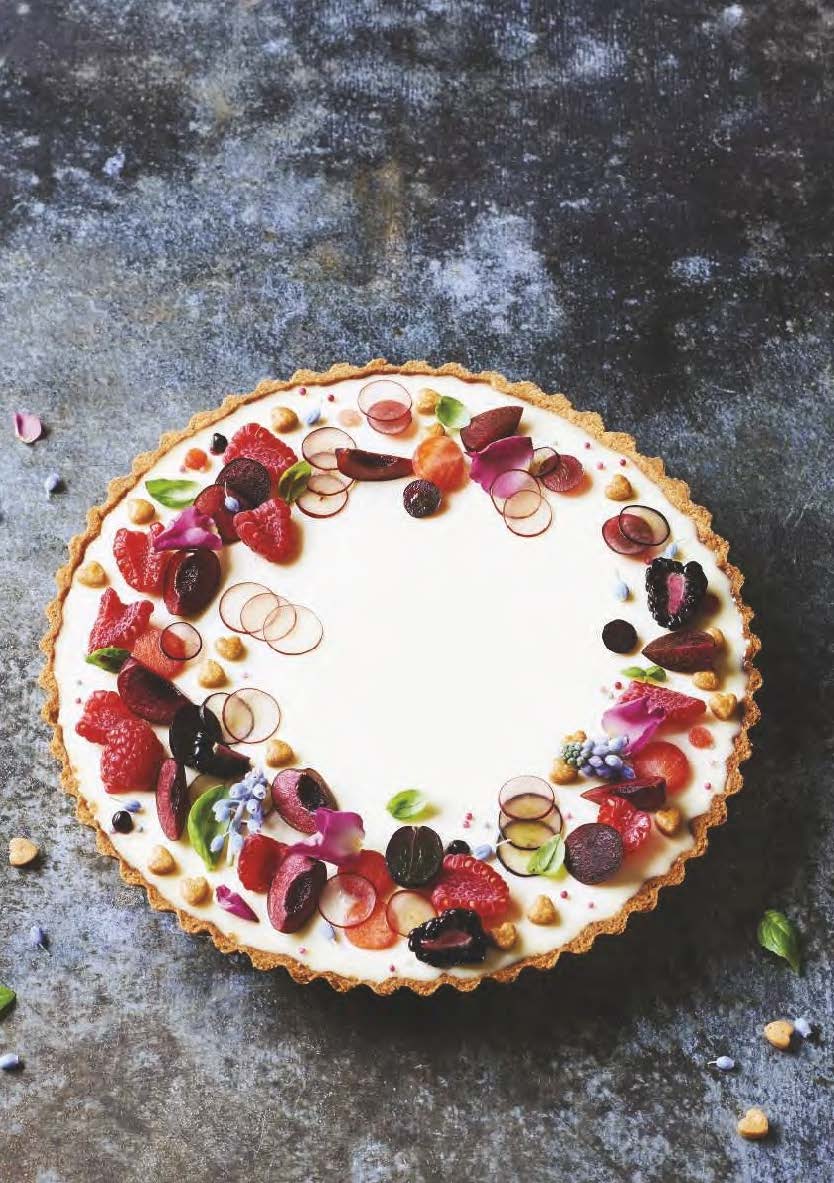
This really is a dreamy dessert – sweet, creamy and meltingly unctuous, and the pristine white surface makes the perfect canvas for artistic decoration. The panna cotta can, of course, be made without the encasing pastry but doing so would mean losing the welcoming crunch. There will be a little of the panna cotta mix left over which, if set into a separate glass, will provide a perfect gluten-free alternative dessert, should one be needed.
You will need
SERVES 8–10 using a fluted, loose-bottomed 23 x 3.5cm (9 x 1½in) circular tin
- 1 quantity sweet shortcrust pastry
- Egg wash
For the panna cotta
- 150ml (5fl oz/²?³ cup) milk
- 4 chamomile tea bags
- 4 sheets gelatine
- 800ml (26fl oz/3¼ cups plus 1 tablespoon) double (heavy) cream
- 200g (7oz/1 cup) caster (superfine) sugar
For the topping
- A selection of prepared fresh fruits
- Baked pastry shapes
- Edible flowers and herbs
- Sugar sprinkles
Method
Make and rest the pastry following the recipe, then line, blind bake and trim a pastry case. Any leftover pastry can be cut into decorative shapes, egg-washed and baked separately to be used as extra decoration.
For the panna cotta, add the milk and tea bags to a saucepan and bring to a simmer. Once simmering, switch off the heat and allow the tea to infuse for 15 minutes. Remove the tea bags, giving them a good squeeze before discarding. Soften the gelatine by soaking the sheets in a bowl of cold water. Add the cream and sugar to the pan of infused milk. Slowly bring the mixture to the boil, stirring now and then to dissolve the sugar. As soon as boiling point is reached, turn off the heat.
Drain the softened gelatine and pat dry with kitchen paper before stirring into the hot cream. When the gelatine has fully dissolved, pass the mixture through a fine sieve into a clean bowl and allow to cool. Once cooled, place in the fridge, checking and stirring every so often until the panna cotta starts to thicken. The ideal pouring consistency required is that of thick custard. Once thickened, carefully pour into the prepared pastry case. Any bubbles that rise to the surface can easily be popped by running the flame of a blow torch over the surface, however this isn’t a necessity, it’s purely for aesthetics. Place back in the fridge until fully set – this should take around 4 hours.
Decorate the tart with a variety of fruits, baked pastry shapes, petals, edible flowers, sprinkles and herbs.
When ready to serve, use a hot dry knife to slice the tart perfectly, wiping the knife between slicing. Serve with an extra portion of fruit macerated with a sprinkling of caster (superfine) sugar and a splash of booze, if you like.
Butterscotch Crunch with Crystallized Rosemary
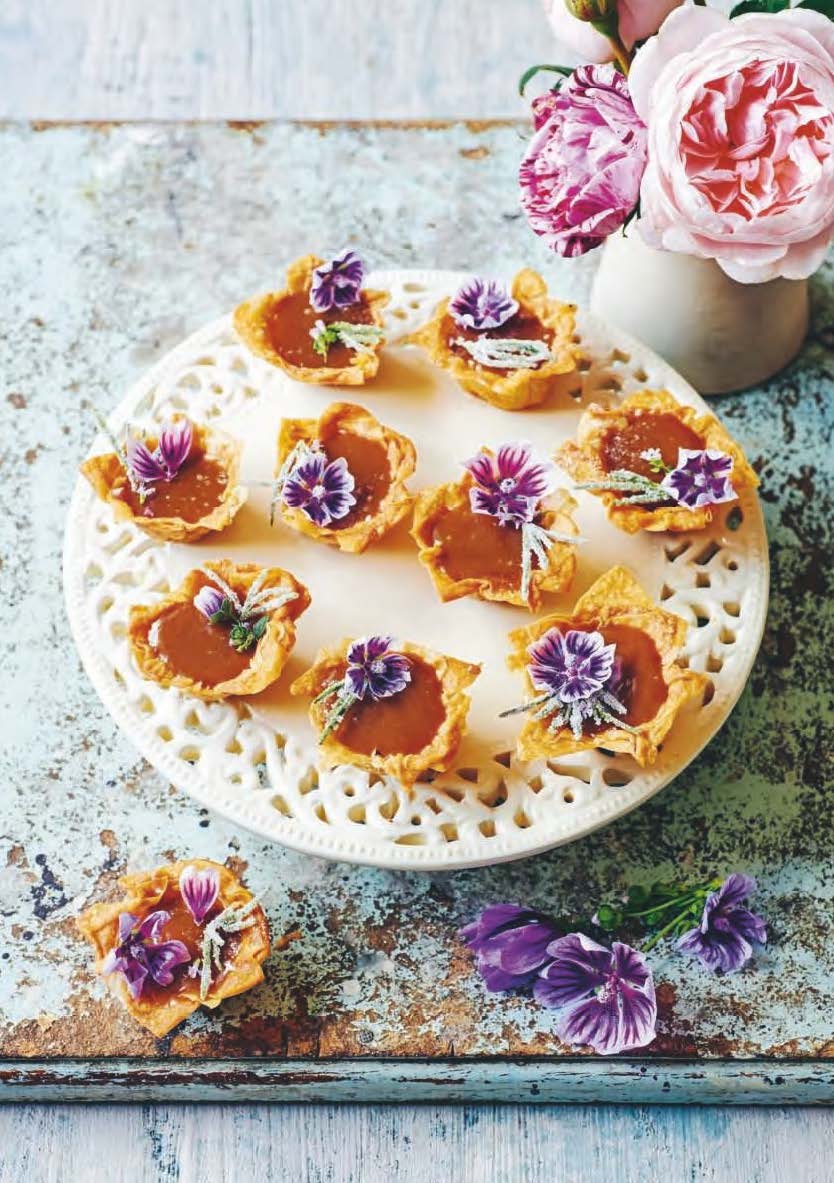
Crystallized rosemary is a complete revelation; it’s really simple to make and is absolutely delicious. It pairs so well with the butterscotch here, so do make it – it elevates these bite-size treats from simple to sophisticated. The cups can successfully be made into dessert-size portions, too – just be sure to offset the extra sweetness of a larger portion with some sharp fruit or pouring cream.
You will need
MAKES 24 CUPS using 2 x 12-hole mini muffin mould trays
- 1 quantity sheet pastry
- 50g (1¾oz/3½ tablespoons) unsalted butter, melted
For the crystallized rosemary
- 200g (7oz/¾ cup plus 2 tablespoons cup) caster (superfine) sugar, plus extra for rolling
- 100ml (3½fl oz/¹?³ cup plus 1 tablespoon) water
- 3 sprigs of rosemary, leaves cut into bundles
- Rosemary or thyme flowers (optional) other edible flowers (optional)
For the butterscotch
- 175g (6oz/¾ cup plus 1 teaspoon) unsalted butter
- 175g (6oz/¾ cup plus 2 tablespoons) soft dark
- brown sugar
- 40g (1½oz/3¼ tablespoons) plain (all-purpose) flour
- 200ml (6¾fl oz/¾ cup plus 2 tablespoons) double (heavy) cream
- 2 teaspoons vanilla bean paste
- Maldon salt
Method
Make and stretch the pastry following the recipe then lightly brush the entire surface with the melted butter. Allow to dry a little before cutting into 7cm (2¾in) squares. Line each tray with 3 squares of the buttered pastry per hole, alternating the direction in which they are laid, which adds a textured edge to each.
Preheat the oven to 180ºC (350ºF), Gas Mark 4. The easiest, most efficient way to blind bake these mini pastry cases is to lay a few layers of ovenproof cling film over the top of the trays and fill each hole with dried rice. Bake in the oven for 8 minutes, then remove the weight and cling film. Prick the base of each pastry cup with a fork and pop back into the oven for a final crisp and to gain some colour. When done, lift out of the trays onto a wire rack and allow to cool fully.
To crystallize the rosemary, add the sugar and water to a small saucepan and stir until the sugar has dissolved. Simmer until reduced by half, then add the trimmed leaves, submerging them in the syrup. Take off the heat and allow the leaves to infuse for 2 minutes. Sprinkle some sugar onto aplate, remove the rosemary leaves from the pan, shaking off any excess syrup. Toss into the sugar and shake the plate until the leaves are coated. Transfer to a sheet of non-stick baking paper to dryand harden.
To make the butterscotch, simply melt the butter and brown sugar together in a saucepan, sprinkle in the flour, pour in the milk and add the vanilla. Heat until boiling, then reduce to a simmer, stirring often, and allow to thicken – this should only take a few minutes. Pour the mixture through a sieve into a jug and fill each pastry cup with the sauce while still hot. Add a little flake of Maldon salt to each and allow to cool. Garnish each with a sprig of crystallized rosemary and finish with edible flowers, if you like, choosing those that will complement the tartlets.
Rosemary and thyme flowers will naturally work well, and the addition of Mallow flowers is not simply for aesthetics, they were chosen because of their delicate flavour. These are best on the day of making.
Sheet Pastry

You will need
MAKES 1 QUANTITY
- 250g (8¾oz/1¾ cups plus 2 tablespoons) plain (all-purpose) fl our, plus extra for dusting
- 1 teaspoon fine salt
- 1 egg
- 100g (3½oz) warm water, around 50°C (122°F)
- 1 tablespoon grapeseed oil, plus extra for rubbing
Method
Place the flour, salt, egg, water and oil into a bowl and mix together using a fork. When the dough is mostly cohesive, turn out onto a lightly floured work surface and knead for 3 minutes, stretching and pulling, rolling beneath hands.
When smooth, shape into a ball and rub all over with a little more oil, then wrap in cling film and rest in the fridge for 30 minutes. It is important to start the next process precisely after the 30-minute resting. I have found this to be the optimum time for the dough to be stretched. I don’t know why, no doubt there will be a scientific reason behind it! I recommend setting a timer after placing it in the fridge, so you don’t forget.
Lightly yet evenly dust the tablecloth with fl our and rub in well. Place the ball of dough in the centre of the table, dust with fl our and start to roll out, trying to keep the shape rectangular. As the dough stretches it is important to rest occasionally for 30-second intervals, to allow the dough to relax – which makes rolling easier. Continue to roll until the surface area has at least doubled, after which time all further stretching must be done by hand.
Snag-free hands are essential here, so if needed do remove any of your rings and clip sharp nails to prevent tearing. Start the stretching by lifting an edge of the dough and gently and slowly pull the dough outwards, until it stretches. Move around to another area and do the same, continuing around the table until the pastry has stretched out towards its edges. Do be patient, only returning to a previously stretched area after 30 seconds or more. Small holes or tears may appear, but worry not – a perfect stretch only comes with practice and usually these snags won’t be noticed when the pastry is used later.
Continue to stretch until the dough hangs over the table’s edges, to secure it in place. Allow the pastry to dry for 5 minutes before trimming all around the outer edge using a pizza wheel. Discard the excess.
Win a copy
The Pastry School by Julie Jones is published by Kyle Books, £25.
Photography by Peter Cassidy
For your chance to win a copy of The Pastry School, please email your name, address and telephone number to dawn@conservationnews.co.uk.
Closing date for entries is Friday 15th May 2020.